Halimede Certificate Authority Documentation
![]()
Darran Kartaschew
System Requirements
The following are the system requirements for using Halimede:
| Operating System | Minimum Version |
|---|---|
| Microsoft Windows | Windows 7, 8, 8.1 or 10 64bit* |
| Apple OS X / macOS | OS X 10.10 or newer |
| GNU/Linux | Ubuntu 16.04LTS or newer |
| Red Hat Enterprise Linux 7 or newer | |
| Debian 9 or newer | |
| Arch Linux |
* Note: 32bit OSes are not supported.
Minimum hardware requirements:
- 1GHz x86 64bit CPU
- 4GB RAM
- 100MB free HDD space
All systems:
Notes: Java 11 direct from Oracle requires a support agreement when used in production environments. If you are to utilise Oracle Java 11, please you have the appropriate licenses to do so. Otherwise it is recommended to use OpenJDK from Azul or AdoptOpenJDK.
Installation
Microsoft Windows
Download and run the MSI based installer. Halimede will be available from the start menu. The MSI based installer includes OpenJDK 11 (from Azul).
Apple OS X / macOS
Download and run the PKG installer. Halimede will be available from Applications. The PKG installer includes OpenJDK 11 (from AdoptOpenJDK).
GNU/Linux
Download the *.tar.gz file, and extract to /opt/halimede. Copy the *.desktop file to /usr/local/share/applications. Halimede should now be available from your DE application menu.
The *.tar.gz file does not include a Java runtime environment. It is recommended to install OpenJDK 11 via your distributions package manager.
Eclipse IDE Plugin
Eclipse plugin can be used from within Eclipse via “Install New Software” with the update site: https://halimede.sourceforge.io/release/1.1.0
Alternatively, Download the *.zip of the P2 Update Site, and Use the “Install new software” dialog, and select the update site ZIP file as the location source.
Select Halimede, and accept the license agreement. Halimede will now install.
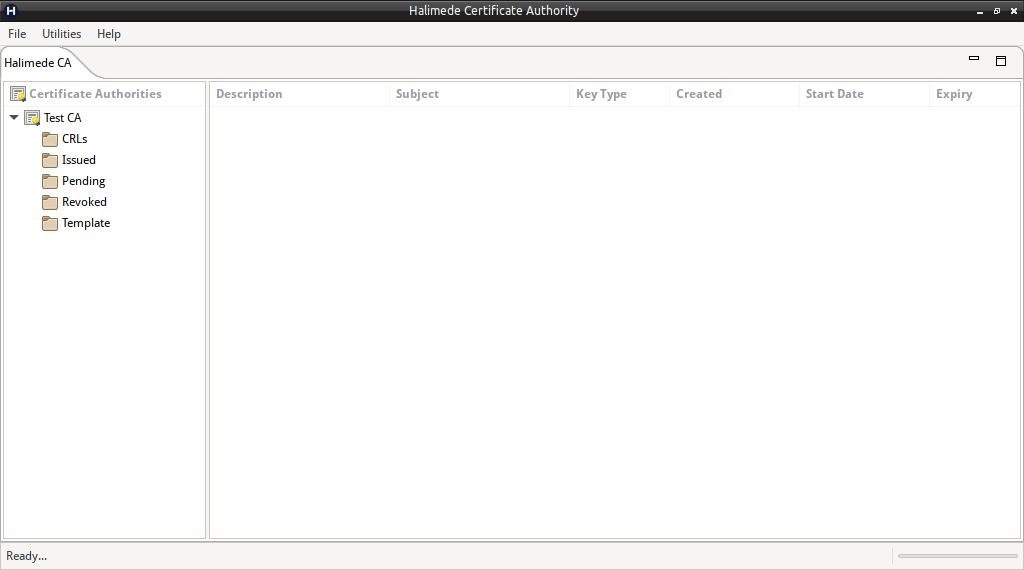
Certificate Authority
Halimede supports running one or Certificate Authorities (CA) at a time, using a wide variety of ciphers for X509 Certificate generation.
Most functions are made available via right-click context menu interface.
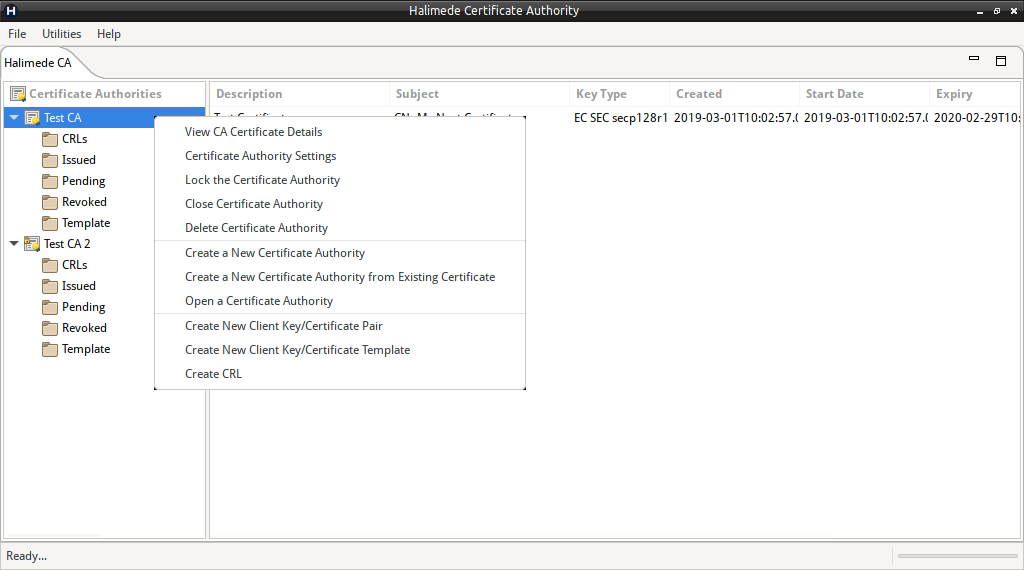
Most functions require the Certificate Authority to be unlocked, therefore if a function is not available, please check the lock status of the Certificate Authority.
To unlock a Certificate Authority, right-click on the Certificate Authority, and select “Unlock”. Halimede will prompt for the Certificate Authority’s password.
Create a new Certificate Authority
Halimede supports creating a new Certificate Authority either by creating a new Certificate and Keying Material or using existing Keying Material.
New Certificate Authority
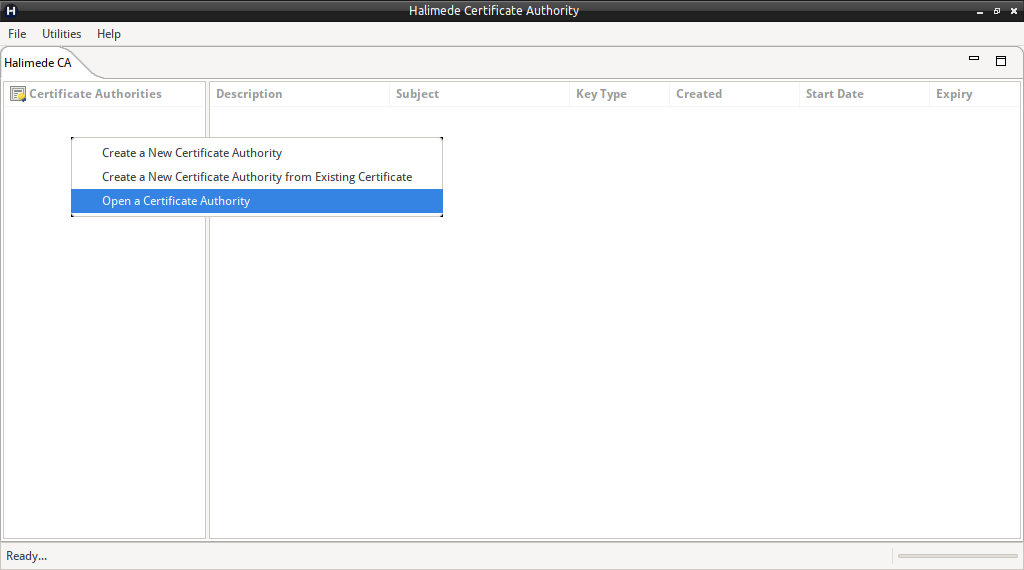
To Create a new Certificate Authority, perform:
- Right-Click on the left pane, and select “Create New Certificate Authority”.
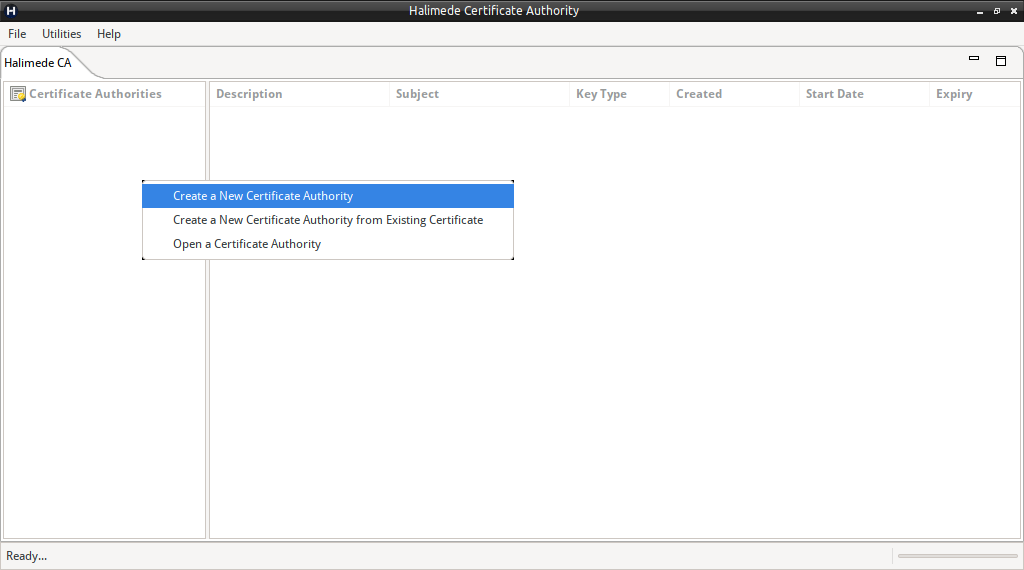
- Enter the Certificate Authority details:
- The Name/Description.
- The Base Location for the Certificate Authority. This location will have the name of the Certificate Authority created as a folder, and the contents of the Certificate will reside in this sub-folder.
- The CA’s X500 Name (or Common Name).
- The keying material type for the CA’s Certificate.
- The Start and Expiry Date for the CA’s Certificate.
- The public location for obtaining the latest CRL. (Optional, if not using or exporting CRLs).
- The Passphrase (entered twice).
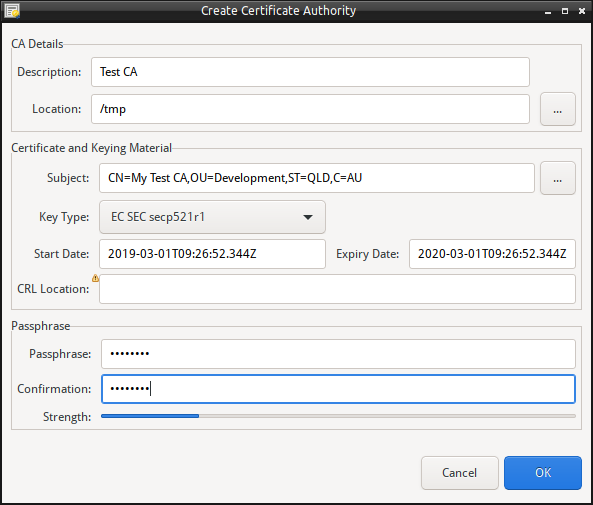
- Click Create to create the Certificate Authority instance. This may take some time depending on the keying material type choosen.
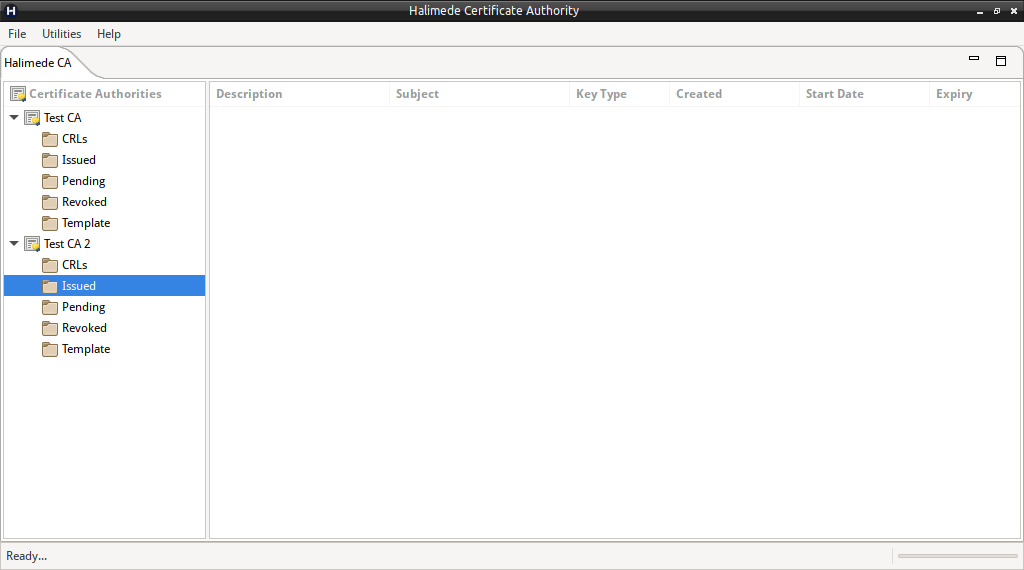
On completion the Certificate Authority will be listed in the left pane of the application.
By default, the newly created Certificate Authority will be unlocked.
New Certificate Authority from Existing Certificate
To Create a new Certificate Authority based on an Existing Certificate, perform:
- Right-click on the left pane, and select “Create New Certificate Authority based on Existing Certificate”.
- Enter the Certificate Authority details:
- The Name/Description.
- The Base Location for the Certificate Authority. This location will have the name of the Certificate Authority created as a folder, and the contents of the Certificate will reside in this sub-folder.
- Select either the existing Certificate from a PKCS#12 store, or the X509 Certificate and match Private Key.
- The Passphrase (entered twice).
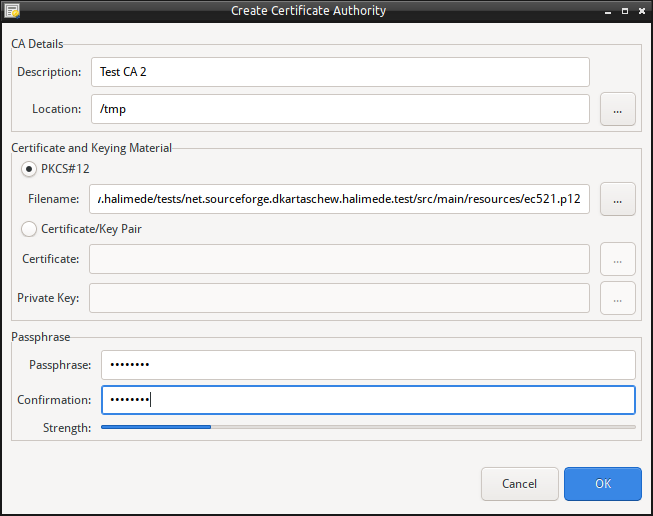
- Click Create to create the Certificate Authority instance. It may prompt for the passphrase to access the PKCS#12 or private key to complete the operation.
By default, the newly created Certificate Authority will be unlocked.
Open Certificate Authority
To Open an existing Certificate Authority, perform:
- Right-click on the left pane, and select “Open a Certificate Authority”.
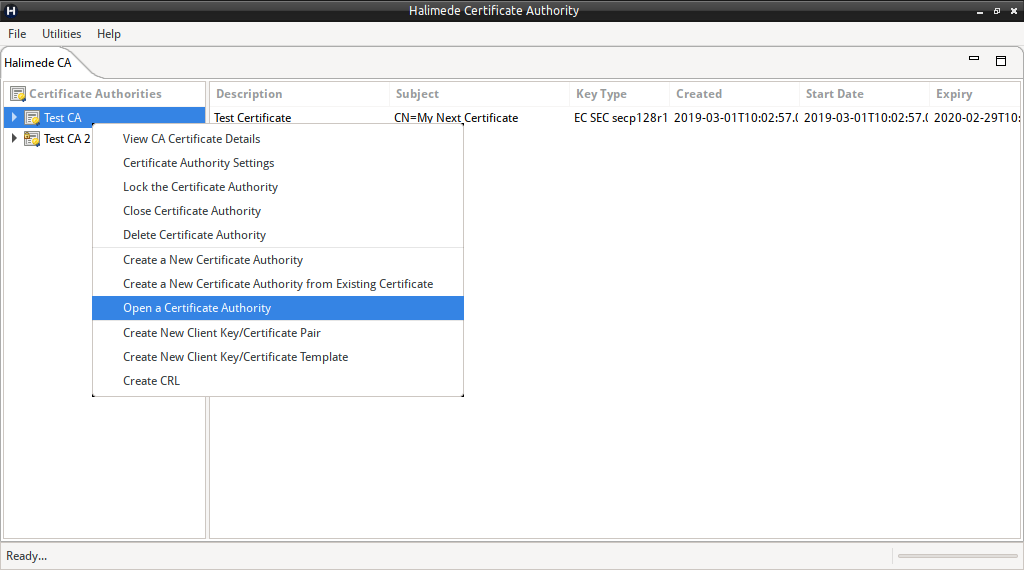
- Select the base location of the Certificate Authority in the dialog.
- Click OK to open the Certificate Authority.
By default, the newly opened Certificate Authority will be locked. (Only limited operations are permitted when the Certificate Authority is locked).
Close Certificate Authority
To close a Certificate Authority, perform:
- Right-click on the Certificate Authority and select “Close Certificate Authority”.
- Click “OK” to perform the action.
The Certificate Authority will now be removed from the left pane.
Delete Certificate Authority
To delete a Certificate Authority, perform:
- Right-click on the Certificate Authority and select “Delete Certificate Authority”.
- Click “OK” to perform the action.
The Certificate Authority will now be removed from the left pane, and deleted from the filesystem. This action cannot be undone.
Settings
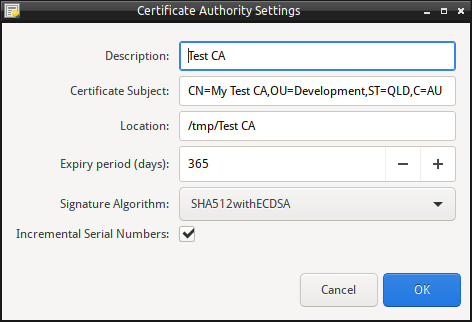
Each Certificate Authority has a number of settings which may be altered by the user. The following settings are available:
- Certificate Authority Description.
- The Description will be displayed in the Left Pane as the name of the Certificate Authority.
- Default Certificate Expiry (for issued certificates).
- This defines the number of days any issued Certificate will expire in from the start date. The user may freely adjust the Not Before and Not After Dates during Certificate creation.
- Default Signature Algorithm to utilise when signing Certificates.
- Defines the Signature Algorithm to use when signing Certificates by this Authority.
- User Incremental or Timestamp based Serial numbers.
- Halimede supports both Incremental and Timestamp based Serial Numbers for signed Certificates. The Timestamp used is milliseconds from UNIX epoch (01-Jan-1970 00:00:00.000 UTC).
To modify the settings for each Certificate Authority, perform:
- Unlock the Certificate Authority if locked.
- Right-click on the Certificate Authority, and select “Certificate Authority Settings”.
- Modify the Settings as required.
- Click Save to update the settings. Or Cancel to cancel the operation.
Create Certificate
Halimede supports creation of Certificates and associated keying material directly, or via a Certificate Signing Request. This section covers creation of Certificates directly. See Certificate Requests for Certificate creation via a Certificate Request.
To create a new Issued Certificate with associated keying material, perform:
- Unlock the Certificate Authority if locked.
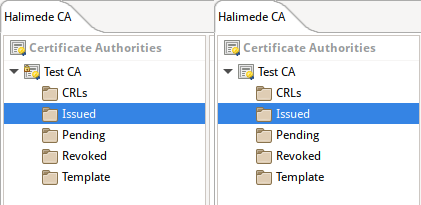
- Right-click on the Certificate Authority or Issued node, and select “Create New Client Key/Certificate Pair”.
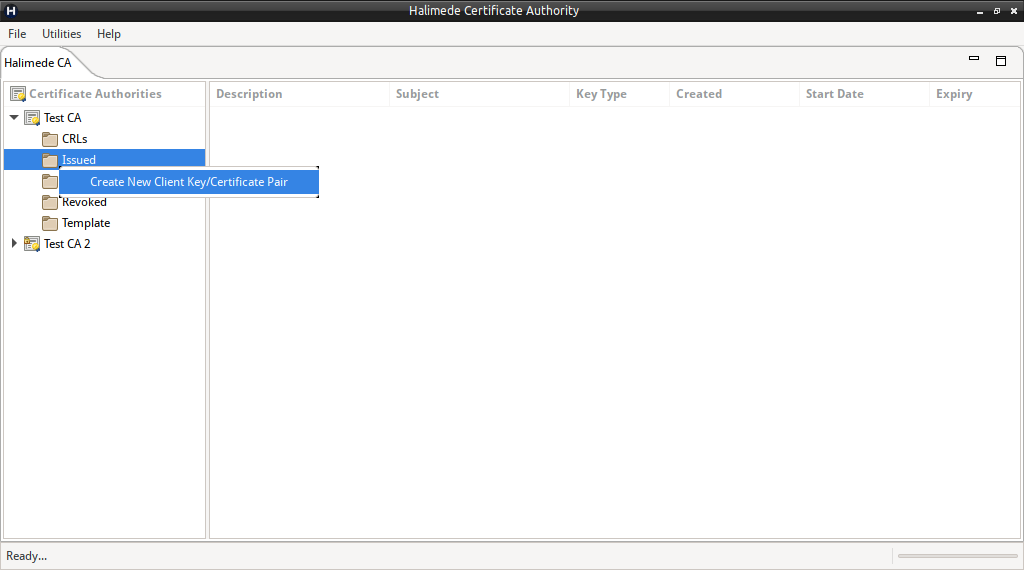
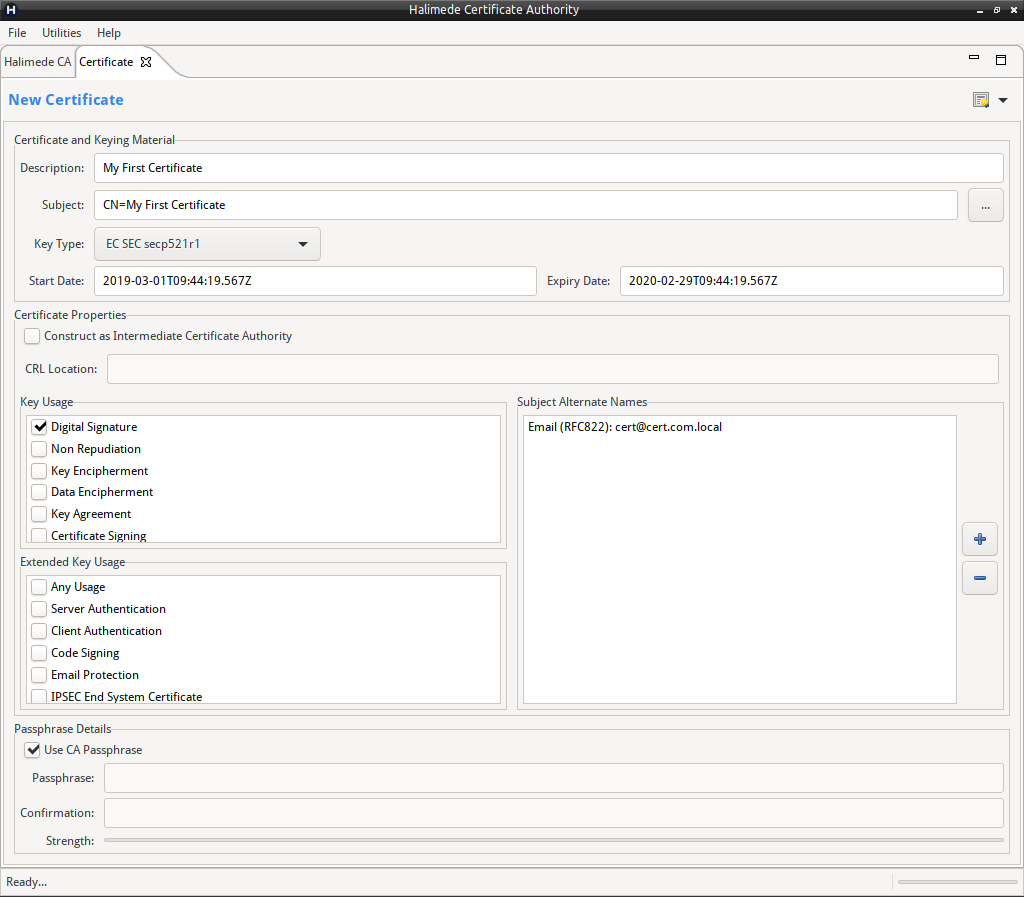
This will open a new pane allowing entry of all required parameters for the X509 Cerificate.
These parameters are:
- Description. A simple description of X509 Certificate.
- Subject. The Certificate’s X500 Subject. A helper is available via the “…” button to the right of the field.
- Key Type. The keying material to create for the certificate. This includes creation of both a private and public key pair. Note: Some keying material may take significant time to generate. If this is the case, a warning will be displayed on the field.
- Start and Expiry Date. These are the Not Before and Not After Dates for the X509 Certificate. All date / times are UTC.
- Flag to indicate to create a Certificate for an Intermediate Certificate Authority. Note: This Intermediate Certificate Authority will have a chain length of 0, indicating that the Intermediate Certificate Authority may sign Certificates, but may not create additional child Intermediate Certificate Authorities.
- CRL Location. The CRL Location of the Intermediate Certificate Authority if the Certificate to be created is for an Intermediate Certificate Authority.
- Flags to indicate the Key Usage of the X509 Certificate. (If the Certificate to be created is for an Intermediate Certificate Authority, some of the Key Usage flags will be automatically selected during Certificate Creation).
- Flags to indicate the Extended Key Usage of the X509 Certificate.
- Subject Alternate Names.
- Click on the “+” icon to add a new Subject Alternate Name.
- Click on the “-” icon to remove a selected Subject Alternate Name.
- Double click on a Subject Alternate Name to edit.
- Each Subject Alternate Name needs the type selected, and the appropriate entry added. The most common types are:
- DNS. Primarily used for defining additional Domain Names for when the Certificate is to be used for a HTTPS or similar service.
- Email. Primarily used to defined additional email addresses when the Certificate is to be used for email signing.
- Directory Name. Primarily used to define additional objects located in LDAP services for user authentication.
- IP Address. Used to define IP address of server offering services.
- Flag to indicate if the Keying material to be stored with the same passphrase as the Certificate Authority or is to use its own passphrase. If it’s to be stored with its own passphrase, the passphrase must be entered twice.
- To create the Keying Material and associated X509 Certificate click on the certificate icon in the top right corner, or from the drop down menu next to the icon, select “Create and Issue the certificate”.
- The drop down menu, also allows you to save this certificate information as a template to be utilised later.
Once the Keying Material and Certificate have been created, it will available in the “Issued” node of the Certificate Authority which create/issued the Certificate.
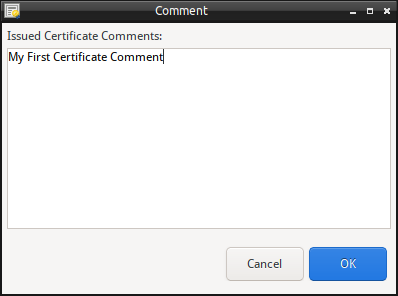
On the “Issued” node of the Certificate Authority, the Certificate/Keying Material can be view, the Certificate may be revoked, or additional comments about the Keying Material/Certificate may be added/updated. (The comments/notes are not exported as part of the X509 Certificate).
To view the contents of the Certificate/Keying Material, perform:
- Right-click on the Certificate and select “View Certificate Details”, or
- Double-click on the Certificate.
To view/edit the comment attached to a Certificate, perform:
- Right-click on the Certificate and select “Update Comment”.
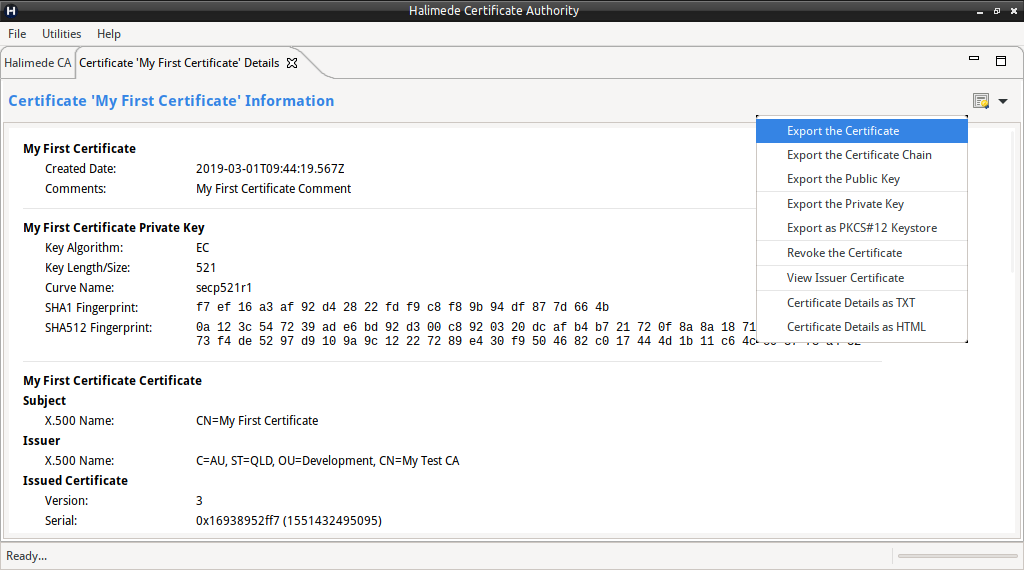
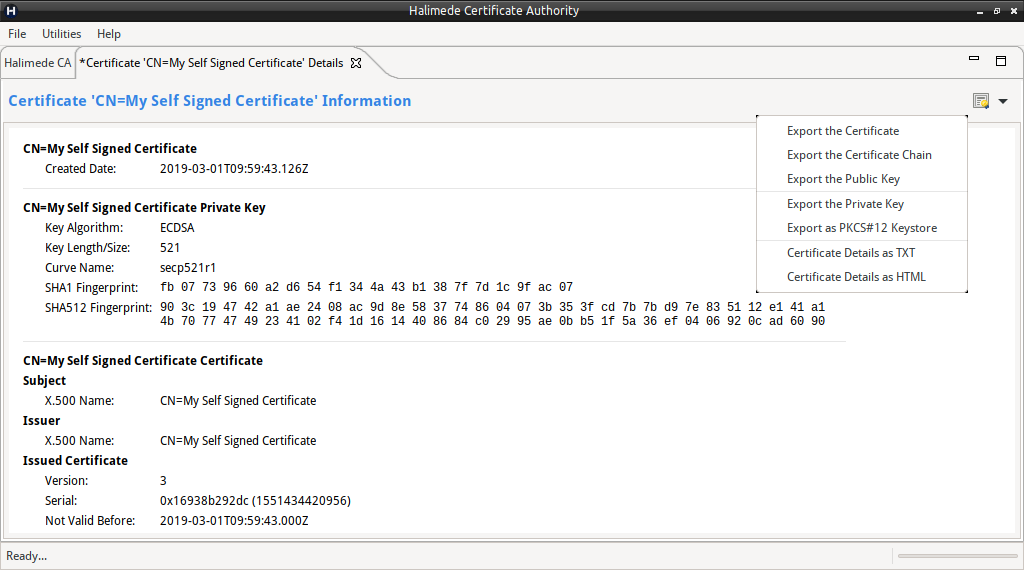
Export Certificate
Certificate and associated keying material can be exported from the Certificate key store when viewing the Ceritifcate Information. The following actions are available:
- Export the Certificate.
- Export the Certificate and the complete Certificate Chain.
- Export the Public Key.
- Export the Private Key (if present).
- Export the Certificate, complete Certificate Chain and Private Key in a PKCS#12 file.
- Export the Certificate Information as either a Text or HTML file.
The Certificate and Keying material can be exported as either DER or PEM formats (where applicable).
All the above actions are available via the drop-down menu from the Certificate Icon when viewing the Certificate Information.
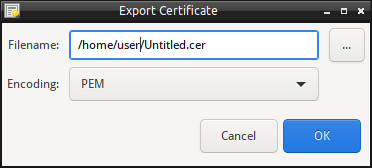
Export Certificate, Certificate Chain or Public Key
To export the Certificate, Certificate Chain or Public Key perform:
- From the drop down menu, select the appropriate action.
- Enter the filename to export to, or use the “…” to select the file name.
- Select the encoding format, either PEM or DER format.
- Select Export to save/export the information.
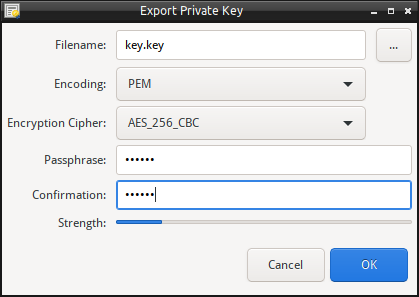
Export Private Key
To export the Private Key (if present) perform:
- From the drop down menu, select “Export the Private Key”.
- Enter the filename to export to, or use the “…” to select the file name.
- Select the encoding format, either PEM or DER format.
- Select the cipher to use to encrypt the private key with.
- Enter the passphrase to protect the private key. (Note: If no passphrase is entered, the private key will not be encrypted).
- Select Export to save/export the private key.
Export PKCS#12 Keystore
To export the Certificate, complete Certificate Chain and Private Key in a PKCS#12 file, perform:
- From the drop down menu, select “Export as PKCS#12 Keystore”.
- Enter the filename to export to, or use the “…” to select the file name.
- Select the cipher to use to encrypt the Keystore with. (Note: whilst the use of 3DES for PKCS#12 is widely supported, support for using AES with PKCS#12 is limited).
- Enter the passphrase to protect the keystore. (Note: If no passphrase is entered, the keystore will not be encrypted).
- Select Export to save/export the information into the keystore.

Revoke Certificate and CRLs
Revoke Certificate
Any Issued Certificate may be revoked at any time. There are two methods to revoke the Certificate, either:
- Right-click on the Issued Certificate from the Issued Certificates pane.
- Use “Revoke the Certificate” menu option from the drop down menu when viewing the Certificate.
On revoking the Certificate, a Revocation Reason is required. Select the reason from the drop down menu.
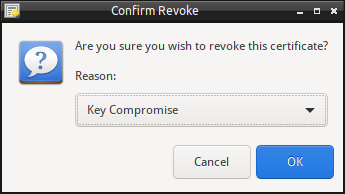
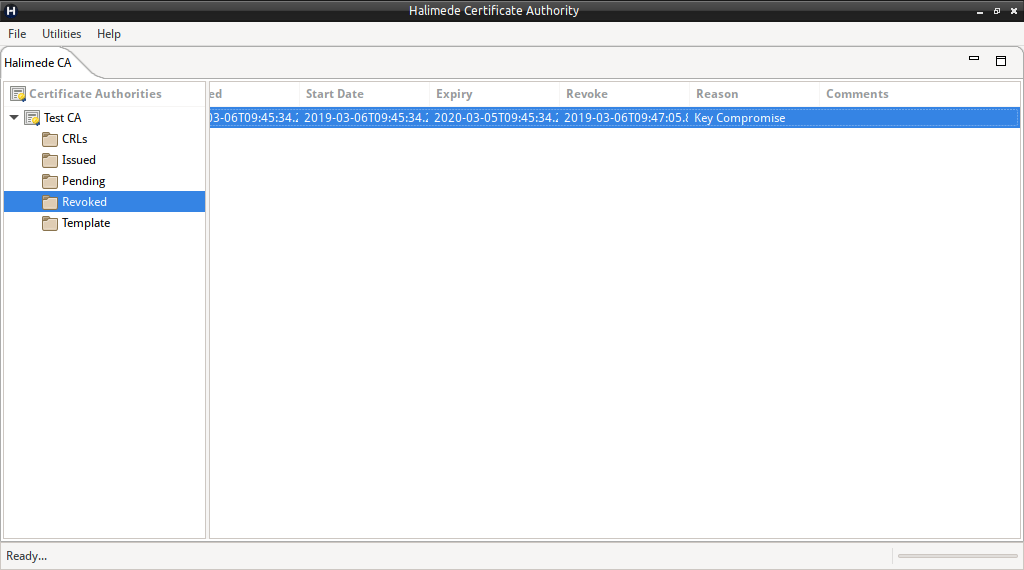
On completion the Certificate will be moved from “Issued” certificates to “Revoked” certificates.
Certification Revocation List (CRL)
Halimede can produce a Certificate Revocation List (CRL) on demand. To produce a CRL for the selected Certificate Authority, perform:
- Right-click on the Certificate Authority or CRLs node, and select “Create CRL”.
- Update or confirm the next CRL date.
- Click Create CRL to generate the CRL.
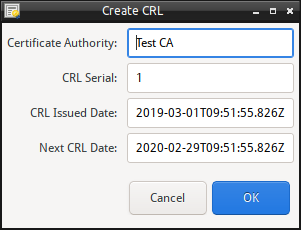
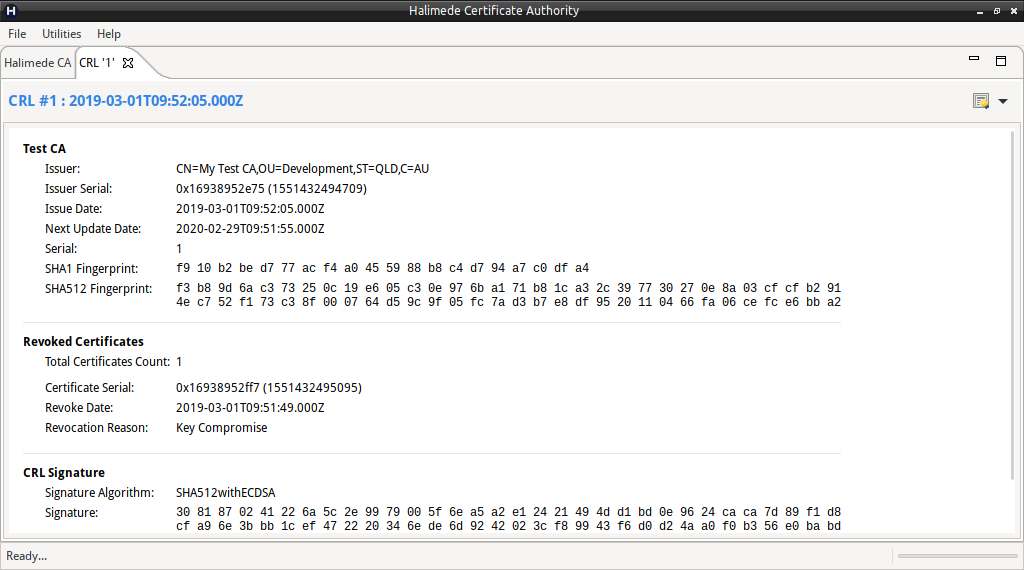
Once the CRL has been generate the CRL View will open displaying the CRL just generated.
Note: Halimede currently has no support for generating delta CRLs. Only complete CRLs can be generated.
To export the CRL, perform:
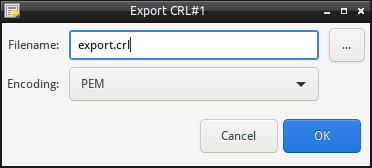
- Click on the certificate button (top right), or via the drop down, select “Export the CRL”.
- Enter the filename to export to, or use the “…” to select the file name.
- Select the encoding format, either PEM or DER format.
- Select Export to save/export the information.
- Upload / copy the file to the location as defined in the CRL Location defined when the Certificate Authority was create.
The CRL can also be saved as a Text or HTML file from the drop down menu on the certificate icon when viewing the CRL.
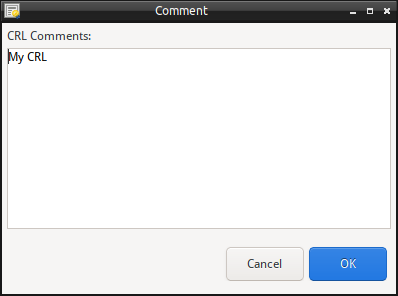
Once a CRL has been generated, it will be available via the CRLs node in the Certificate Authority. To open the CRL, right-click on the CRL, and select “View CRL”. Additionally, a CRL may have a comment attached, to update the comment, right-click on the CRL, and select “Update Comment”.
CRL Policy
IETF RFC 5280 covers expected policy on the usage of CRLs with Certificate Authorities. It is expected that the user follow the policies and guidelines within RFC 5280.
In the general case, it is expected that:
- On creation of the Certificate Authority, a CRL location is defined.
- On creation of the Certificate Authority, create a CRL and publish to the CRL location defined. This will set the expected next update time.
- On or before the next update time, generate a new CRL and publish. CRLs can be generated at any time, on provision that it is always before the next update time noted in the prior CRL.
Certificate Requests
Halimede supports the import of external Requests for Certificate (also known as a Certificate Signing Request (CSR)). Once the CSR has been imported, a Certificate can be issued based on the information in the CSR.
To import a CSR, perform:
- Right-click on the “Pending” node under the Certificate Authority and select “Import a Certificate Request”.
- Select the Certificate Signing Request (CSR).
- The CSR will be imported.

To view a CSR once imported, perform:
- Double-click on the CSR in the Pending Pane, or
- Right-click on the CSR, and select “View Certificate Details”.
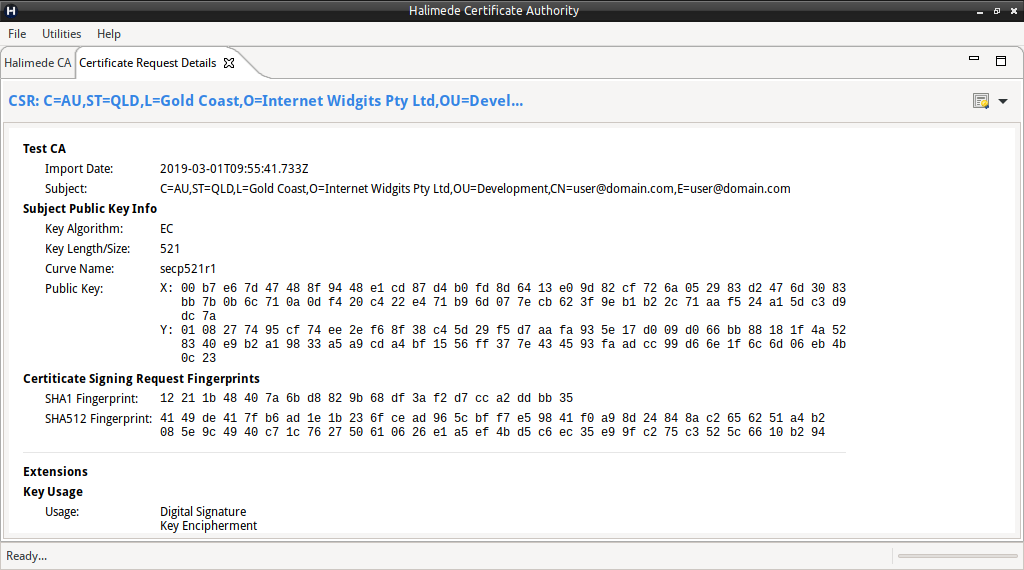
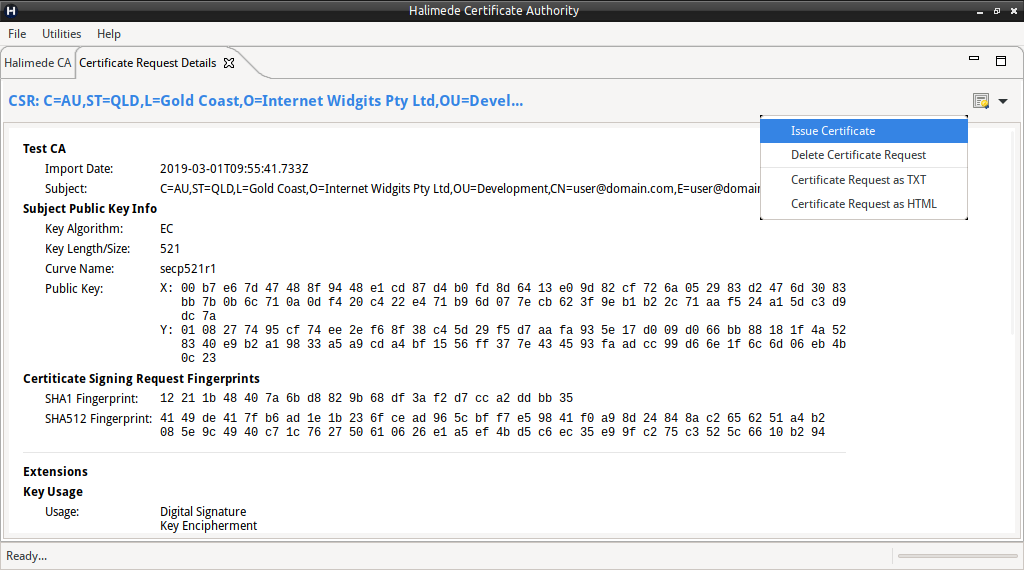
A new pane will open displaying the Certificate Signing Request details.
To issue a Certificate based on the CSR, perform:
- Right-click on the CSR, and select “Create new Certificate”, or
- if viewing the CSR, click on the certificate icon, and select “Issue Certificate”.
- This will open a pane very similar to the information pane used when creating a new certificate.
- Set or add any additional information, and click on the Certificate Icon in the top right to issue the certificate. The resulting certificate can be exported as per instructions above.
Note: Not all X509 Certificate extensions that are defined within the CSR may be supported by Halimede, therefore may not be present in the resulting issued Certificate.
Certificate Templates
Halimede during Certificate Creation, can create a Template based on the current input in Certificate Details pane.
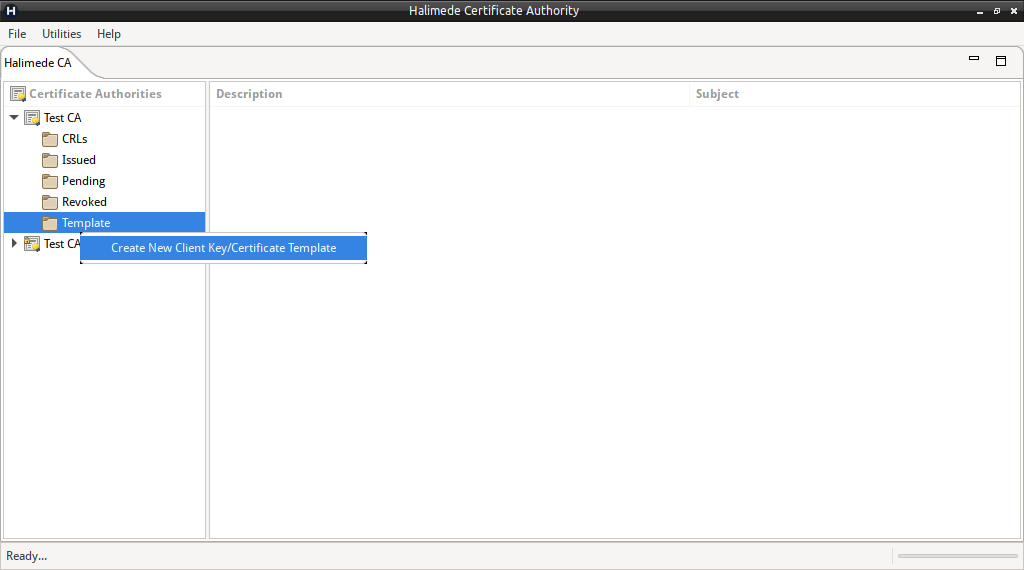
To create a new Template, perform:
- Right-click on the “Templates” node under the Certificate Authority, and select “Create a new Client Key/Certificate Template”.
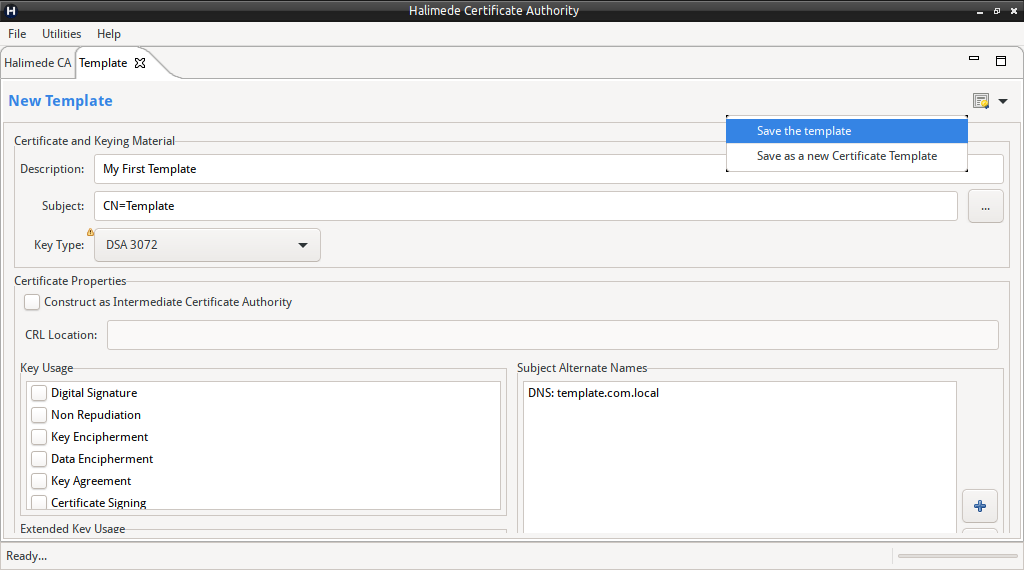
- This will open a new Certificate Template pane.
Enter details as needed, and to save, click on the Certificate Icon in the top right corner.
To issue a new Certificate, based on a Template, perform:
- Double-click on the Template, or
- Right-click on the Template and select “Create New Certificate”
This will open a New Certificate pane, pre-filled from details from the template.
To edit or delete a Template, right-click on the template, and select the appropriate option from the menu.
Backup and Restoration
Halimede provides simple methods to backup and restore the Certificate Authority to/from ZIP files.
To backup the Certificate Authority, perform:
- Right-click on the Certificate Authority, and select “Backup Certificate Authority”.
- Select the file to backup to, and click on “Save”.
A progress dialog will be displayed during the operation.
To restore a Certificate Authority, perform:
- Right-click on the left pane, and select “Restore Certificate Authority”.
- On the Restore Dialog, select the backup file name, the location to restore to, and if you wish to automatically open the Certificate Authority on completion.
- Click Restore to restore from the Backup File.
A progress dialog will be displayed during the operation.
Alternative method
All data files for each Certificate Authority are contained with the single nominated folder which hosts the Certificate Authority.
Therefore backup can be performed by simply archiving/copying the folder.
Note: Recovery of passwords for any keying material for a Certificate Authority is currently not possible. (Unless you know of a method of decrypting a PKCS#12 container utilising AES256).
General Utilities
Halimede includes a number of general purpose utility functions. These include and not limited to, viewing X509 Certificates, viewing keying material, viewing external CRLs and creating self signed Certificates.
Create Self-Signed Certificate
Halimede can create a Self-Signed Certificate for general purpose use.
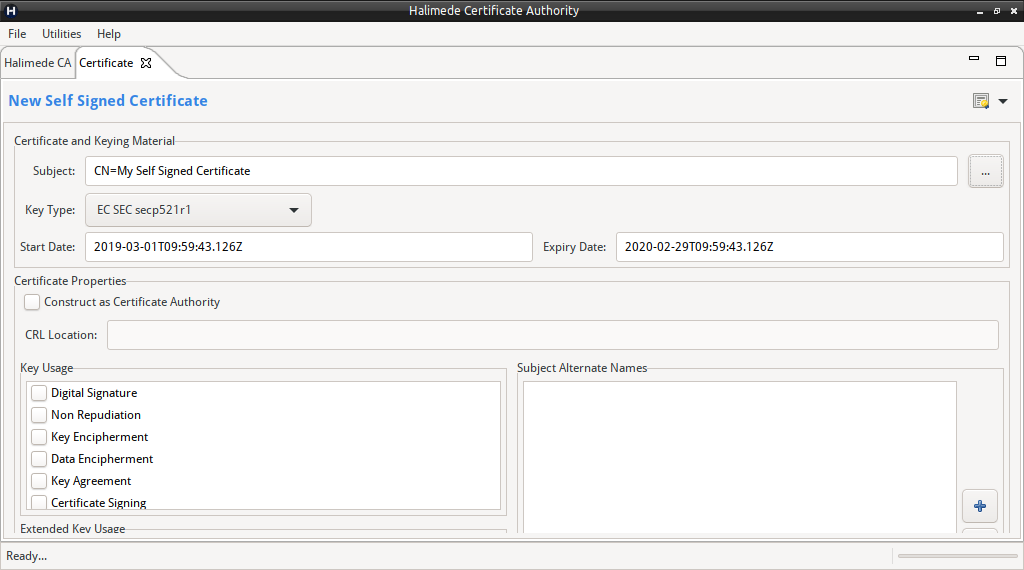
To create a self-signed Certificate, perform:
- From the “Tools” menu, select “Create Self-Signed Certificate”.
- Enter details for the Certificate.
- Click on the Certificate Icon (top right corner) and select “Create Certificate”.
- Once created, a Certificate View will be displayed.
- The keying material and Certificate have not been saved to disk.
- To save the new Certificate and Keying Material, click on the context menu of the Certificate Icon (top right corner) and select “Export as PKCS#12 Keystore”.
- Enter the filename to export to, or use the “…” to select the file name.
- Select the cipher to use to encrypt the Keystore with. (Note: whilst the use of 3DES for PKCS#12 is widely supported, support for using AES with PKCS#12 is limited).
- Enter the passphrase to protect the keystore. (Note: If no passphrase is entered, the keystore will not be encrypted).
- Select Export to save/export the information into the keystore.
- You can export other elements of the generated Certificate and Keying material from the Certificate Icon drop down menu.
View Certificate
To view, a X509 Certificate, keying material (contained in a PKCS#12 container), a CRL or CSR, select the applicable menu option from the “Tools” menu and select the desired file. If a passphrase is required, a prompt for the passphrase will be displayed.
The resulting file will be displayed in the applicable view pane. Once open, various options are made available via the Certificate Icon in the top right corner, including:
- Export as HTML or TXT report file.
- Export keying material.
- Export Certificate or Certificate Chain
- If a CRL, re-export the CRL in a different format. (Useful for converting between PEM and DER formats).
Note: Options available will be based on the file being opened.